

Leora J. Goodin
I'm a blogger dedicated to sharing insights on lifestyle and wellness. Through personal stories and practical tips, I aim to inspire and empower my readers to lead healthier, more fulfilling lives.
Students and teachers save a massive 71% on Creative Cloud All Apps
Black Friday and Cyber Monday 2023 Deals for Motion Designers, grab it now!
Capture your Windows 10 screen effortlessly with hotkeys—unlock hidden shortcuts that simplify recording and enhance productivity. Discover the full guide now.
To record your screen on Windows 10 using hotkeys, first enable the Xbox Game Bar in Settings under Gaming. Press Windows key + G to open it, then start recording with Windows key + Alt + R. Use the same combo to stop. You can also save the last 30 seconds with Windows key + Alt + G. Adjust audio settings via the Game Bar. If you keep going, you’ll find tips on managing recordings and troubleshooting common issues.
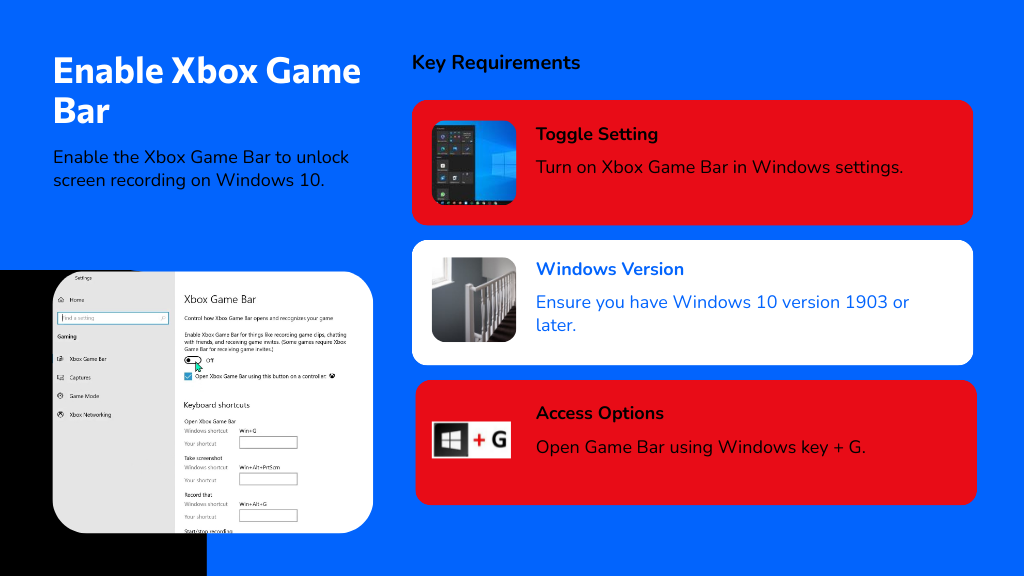
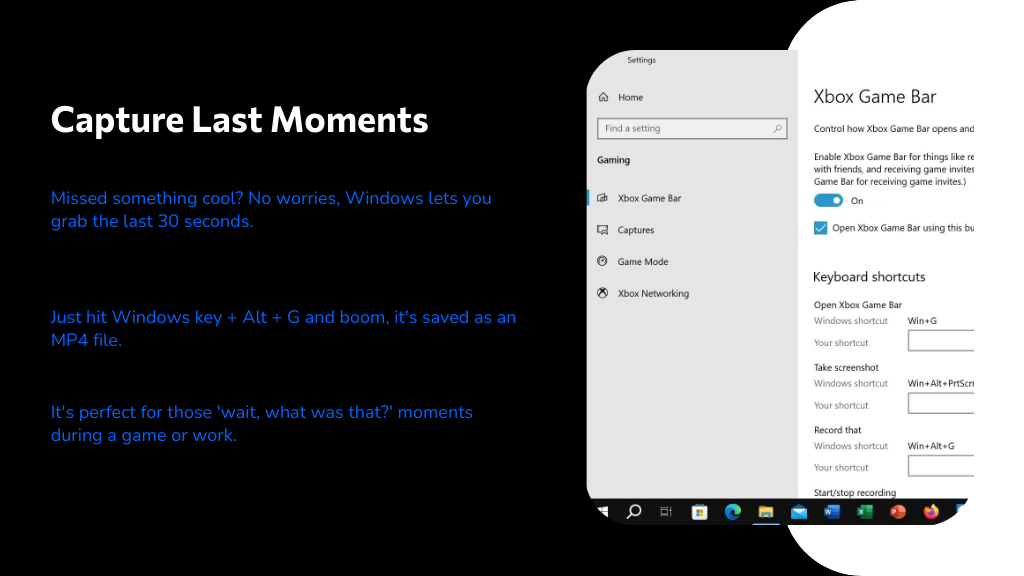
Before you can start recording your screen on Windows 10, you’ll need to enable the Xbox Game Bar. Head to Settings > Gaming > Xbox Game Bar and toggle the “Enable Xbox Game Bar” option on. Make sure your Windows 10 version is 1903 or later, as this is required for the feature to work smoothly.
Once enabled, you can quickly open the Game Bar using the screen recorder shortcut key Windows key + G. This lets you access the recording interface, where you can adjust settings like audio capture.
Open the Game Bar with Windows key + G to access recording options and adjust audio settings easily.
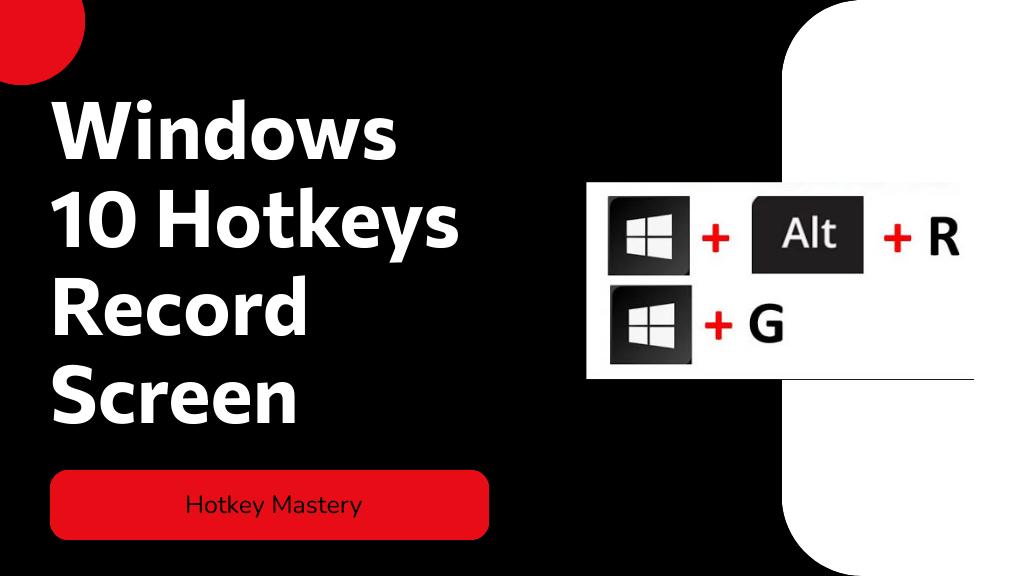
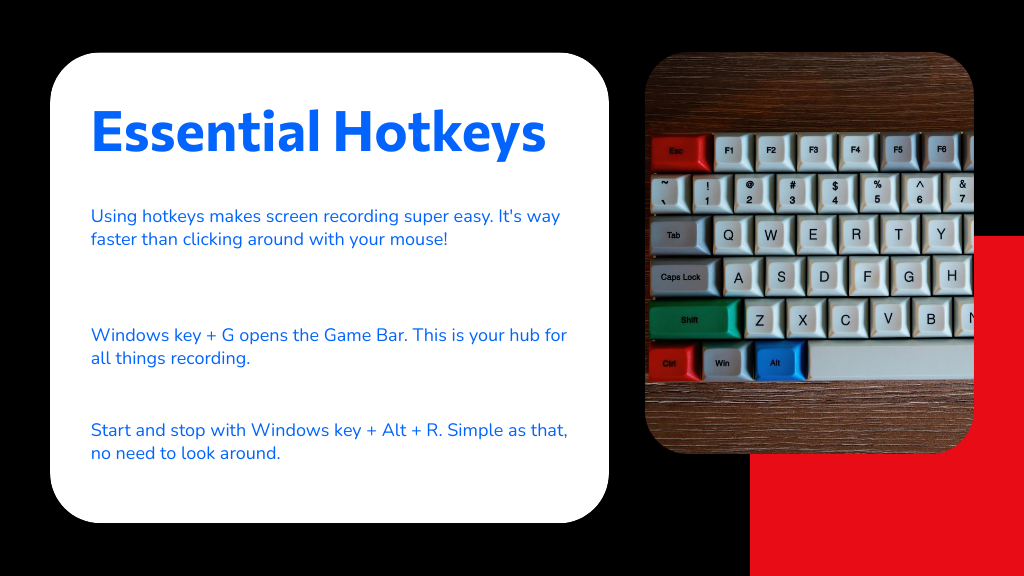
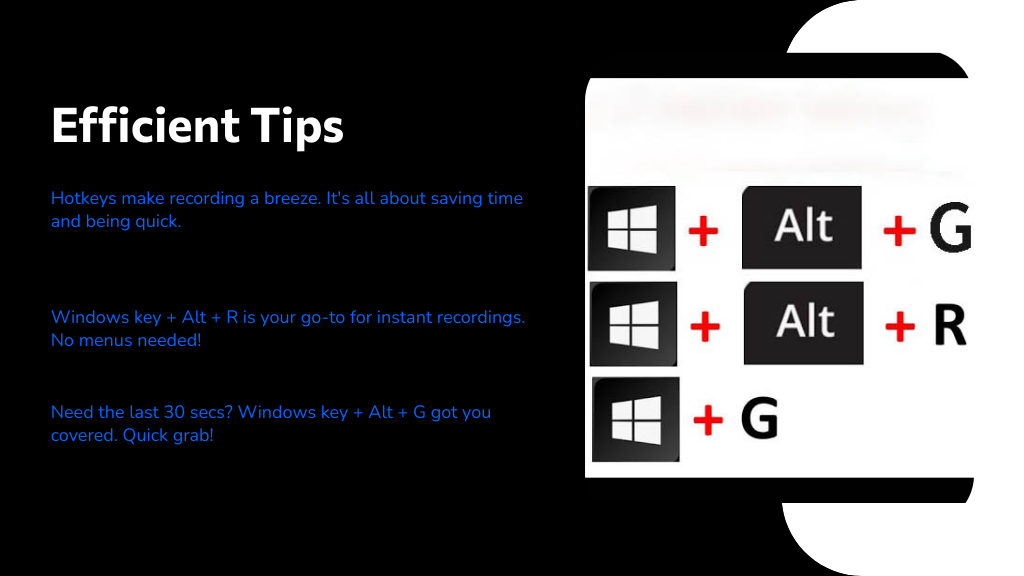
To start and stop recording, use the screen record shortcut Windows key + Alt + R. These are essential Windows 10 hotkeys record screen functions that make capturing your screen fast and easy.
Mastering just a few essential Windows 10 hotkeys can make screen recording quick and hassle-free. To open the Xbox Game Bar, press Windows key + G, which brings up the interface you need to start capturing. When you're ready to record, hit Windows key + Alt + R to begin capturing your screen activity; this saves your recording as an MP4 file automatically.
If you want to grab the last 30 seconds of what just happened, press Windows key + Alt + G while the Game Bar is active. You can stop your recording anytime by pressing Windows key + Alt + R again or clicking the Stop button on the recording panel. For customizing capture settings, go to Settings > Gaming > Captures.
You can quickly start and stop screen recordings by pressing Windows key + Alt + R, making it easy to capture exactly what you need. If you want to save the last 30 seconds of your activity without recording the entire session, just press Windows key + Alt + G. Make sure the Game Bar is enabled so these shortcuts work smoothly.
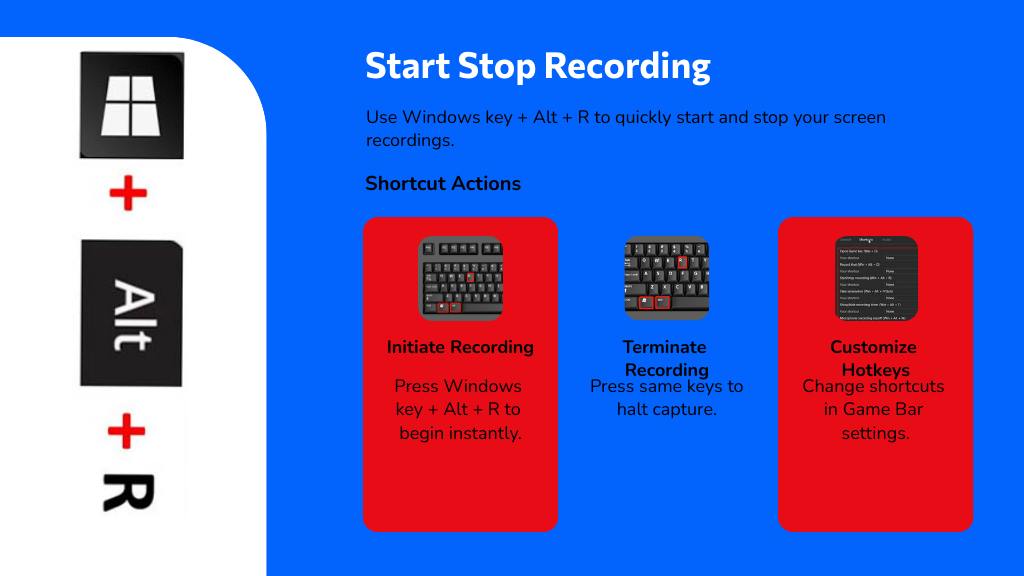
Two simple keyboard shortcuts let you start and stop screen recordings quickly using the Xbox Game Bar on Windows 10. To start recording your screen, just press Windows key + Alt + R. This shortcut immediately begins capturing your screen without opening any menus, so you can focus on your task.
When you want to stop, you can press the same keys again or click the Stop button on the recording panel that appears. If you prefer, you can customize these hotkeys in the Game Bar settings under Settings > Gaming > Captures to better match your workflow.
Using this shortcut is a fast, convenient way to capture your screen, whether you’re making tutorials, recording gameplay, or saving important moments without interruptions.
When it’s time to stop recording your screen on Windows 10, the same shortcut you used to start—Windows key + Alt + R—works just as well to end the capture instantly.
Pressing it again stops the recording without needing to open the Xbox Game Bar interface. Alternatively, you can click the Stop button in the small recording panel that appears on your screen while recording.
Make sure the Xbox Game Bar is enabled in your settings (Settings > Gaming > Xbox Game Bar) for these shortcuts to function. If you prefer, you can customize this stop recording shortcut within the Game Bar settings. Using this method keeps your workflow smooth and lets you control recordings quickly without interrupting what you’re doing.
How can you quickly capture the last moments of your screen activity without starting a full recording? Simply press Windows key + Alt + G. This shortcut triggers the Xbox Game Bar to save the previous 30 seconds of your screen, perfect for grabbing unexpected highlights.
If you want to start a fresh recording, just hit Windows key + Alt + R, and your screen capture begins immediately. When you’re done, pressing Windows key + Alt + R again stops and saves the video.
You can customize the recording length in the Game Bar settings, extending it up to 4 hours if needed. All your recordings are automatically saved as MP4 files in the VideosCaptures folder, making it easy to find and edit them later.
Capture the last 30 seconds of your screen activity on Windows 10 by pressing Windows key + Alt + G while using any application. This handy feature is part of the Xbox Game Bar, letting you save recent screen moments without having to record beforehand. Before you start, make certain the Game Bar is enabled in Settings > Gaming > Xbox Game Bar.
The Xbox Game Bar lets you save recent screen moments without pre-recording—just enable it in Settings first.
When you capture the last 30 seconds, keep in mind:
This quick method guarantees you never miss important screen activity again.
When recording your screen, you’ll want to enable microphone capture and adjust system audio for the best results. You can quickly toggle these audio settings using hotkeys while the Game Bar is active. Mastering these shortcuts helps you control your recording’s sound without interrupting your flow.
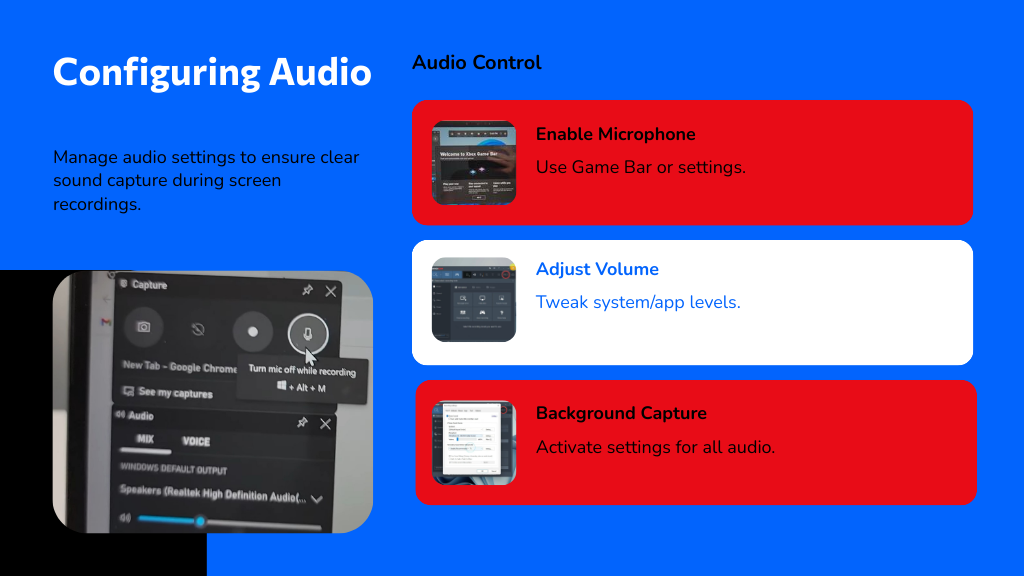
To enable microphone capture while recording your screen, you’ll want to start by opening the Xbox Game Bar with the shortcut Windows key + G.
Once open, check the microphone icon in the Capture pane to toggle audio capture on or off. If it’s off, your voice won’t be recorded, so make certain it’s active before you begin.
Here’s how to verify mic capture is set up properly:
Following these steps lets you record your screen with your voice seamlessly.
Managing your system audio while recording on Windows 10 is straightforward with a few handy hotkeys. Start by pressing Windows key + G to open the Xbox Game Bar overlay, then navigate to the Capture pane’s audio settings. Here, you can toggle between system audio and microphone capture to customize your recording.
For finer control, right-click the speaker icon in the system tray and select 'Open Volume Mixer' to adjust individual app volumes in real-time. If you want to capture all audio activity, activate background recording via Settings > Gaming > Captures.
Finally, use Windows key + Alt + R to quickly start or stop your recording without leaving your workflow. These shortcuts guarantee you manage system audio efficiently during your screen recordings.
A handy way to control your audio settings during screen recording is by using toggle hotkeys in Windows 10. Instead of digging through menus, you can quickly manage your microphone and system audio with simple key combinations, making your recording experience smoother.
Here's how to use toggle audio hotkeys effectively:
One of the easiest ways you can access your recorded videos is through the VideosCaptures folder in your user directory on Windows 10 and 11. Your screen recordings, saved in MP4 format, are compatible with most video editors, making it simple to edit or share them.

Screen recordings saved as MP4 files work seamlessly with most video editors for easy editing and sharing.
To manage recordings quickly, use the Windows key + G to open the Game Bar, where you can view captures immediately after stopping. Press Windows key + Alt + R to start or stop recording without traversing menus.
If you want to save the last 30 seconds of activity, just press Windows key + Alt + G. These shortcuts streamline accessing and managing your videos, keeping your workflow smooth and efficient.
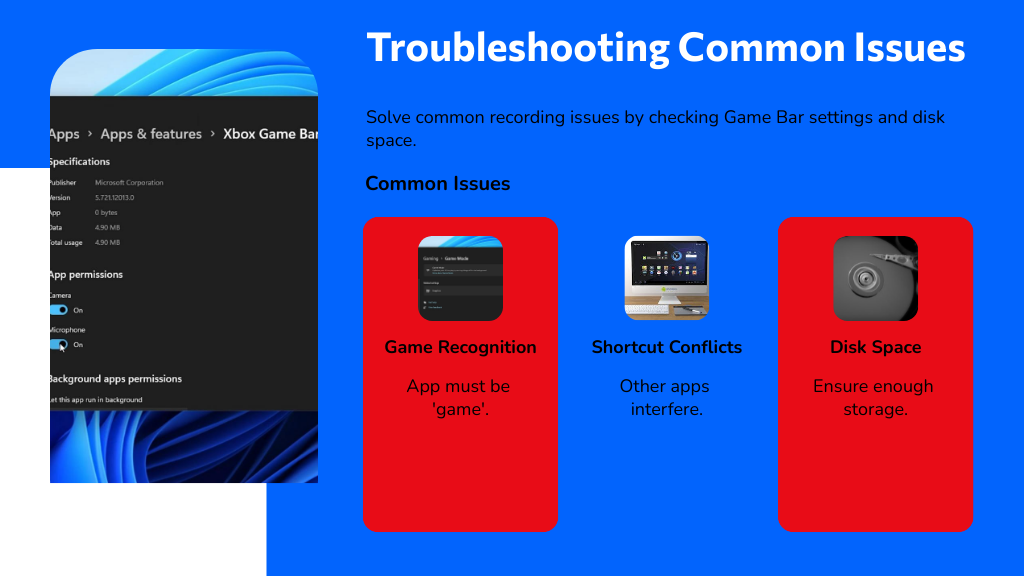
If your hotkey recordings aren’t working as expected, it could be due to several common issues. First, the Xbox Game Bar is designed mainly for gaming, so if the app you’re recording isn’t recognized as a game, recording might fail.
Conflicting keyboard shortcuts from other programs can also block the Game Bar from activating. Finally, low disk space can interrupt the recording process.
To troubleshoot, check these:
Addressing these points will help restore your hotkey recording functionality quickly.
While screen recording can seem complex, using Windows hotkeys simplifies the process and saves you time. To start recording quickly, press Windows key + Alt + R to capture the active window without opening menus. If you miss something, use Windows key + Alt + G to grab the last 30 seconds instantly.
Press Windows + Alt + R to record instantly or Windows + Alt + G to capture the last 30 seconds.
For more control, open the Game Bar with Windows key + G to access the capture pane and manage recordings. Remember, your videos are saved automatically in the Videos > Captures folder, so you can find them easily after recording.
Using these shortcuts lets you focus on content rather than navigation, making your workflow smoother and more efficient every time you record your screen.
Mastering Windows 10 hotkeys for screen recording isn’t just about convenience—it’s about seizing control of your digital story with the flick of a finger. Like a conductor guiding an orchestra, your keyboard shortcuts orchestrate seamless captures, ensuring you never miss a moment. So, plunge into it, experiment, and let these tools transform how you record, edit, and share your screen—because in your hands, every click becomes a powerful act of creation.

I'm a blogger dedicated to sharing insights on lifestyle and wellness. Through personal stories and practical tips, I aim to inspire and empower my readers to lead healthier, more fulfilling lives.
Your email address will not be published. Required fields are marked *