
To start your watercolor journey, gather essential tools like quality paints, brushes, and paper. Begin experimenting with techniques such as wet-on-wet and dry brushing to create beautiful textures. Focus on color mixing using primary colors to develop your palette. Practice layering and adding details for depth in your art. Remember, mistakes are part of the process. As you explore these techniques, you'll reveal more tips and ideas for creating stunning watercolor paintings.
Key Takeaways
- Start with simple shapes and outlines to build confidence before adding details in your watercolor paintings.
- Use the wet-on-wet technique for soft backgrounds and blending colors seamlessly.
- Experiment with layering techniques, allowing each layer to dry for depth and dimension.
- Incorporate brush techniques like glazing and dry brush for texture and detail enhancement.
- Embrace mistakes as learning opportunities; practice regularly to develop your unique style and skills.
Essential Tools and Materials

To plunge into watercolor painting, you'll want to gather some essential tools and materials that make the process enjoyable and efficient. Start with a good set of watercolor paints—pan or tube, whichever suits you best. Next, invest in high-quality watercolor brushes; a variety of sizes will help you create different effects.
You'll also need watercolor paper, designed to handle moisture without warping. Don't forget a palette for mixing colors and a container for clean water. A pencil and eraser can help you sketch your ideas before adding paint. With these essential tools and materials, you're well on your way to exploring watercolor painting for beginners.
Understanding Watercolor Techniques
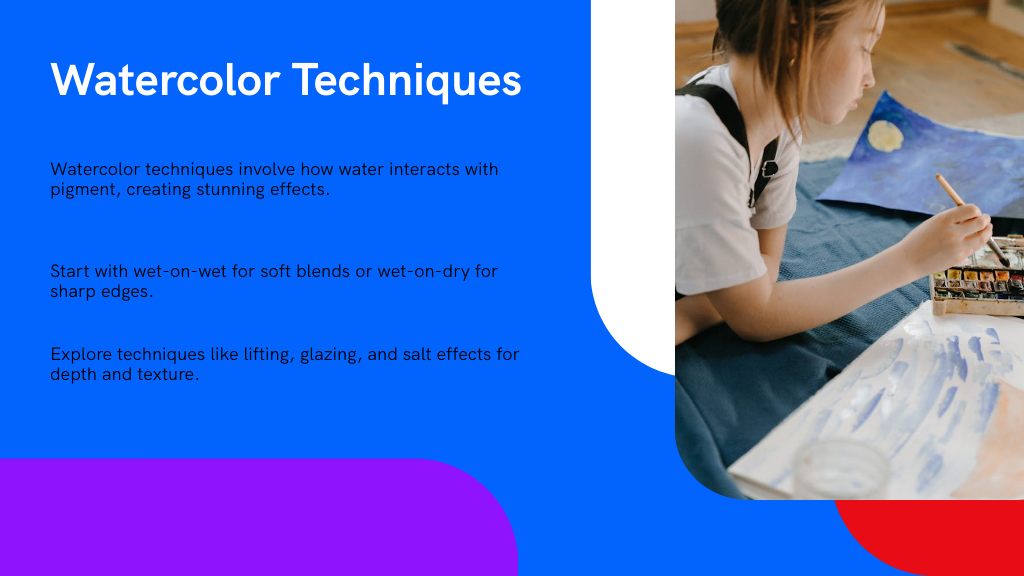
While mastering watercolor techniques may seem intimidating at first, you'll find that experimenting with different methods can be both fun and rewarding. Understanding watercolor techniques involves grasping how water interacts with pigment, allowing you to create stunning effects.
Start with wet-on-wet for soft blends or try wet-on-dry for sharp edges—both are excellent watercolor painting ideas for beginners. Don't forget to explore techniques like lifting, glazing, and salt effects, which can add depth to your art.
Remember, practice is key, and there's no right or wrong way to express yourself. Embrace your creativity, and enjoy the journey as you discover the unique beauty of watercolor. You're part of a vibrant community, so share your work and learn from others!
Color Mixing Basics
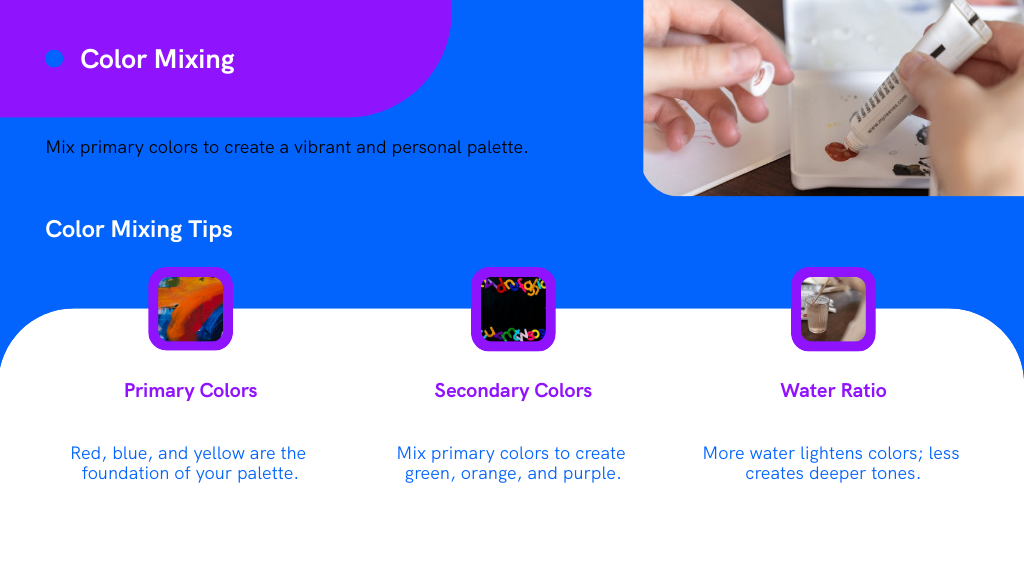
After getting a grasp on various watercolor techniques, understanding color mixing is the next step in your artistic journey. Color mixing can seem challenging, but it's a fun and rewarding part of watercolor for beginners. Start with the primary colors: red, blue, and yellow. When you mix these, you'll create secondary colors like green, orange, and purple.
Experimenting is key; try different ratios to see what unique shades you can produce. Remember, water plays a vital role—more water lightens your colors, while less creates deeper tones. Don't be afraid to make mistakes; each one teaches you something new. Embrace this process, and you'll soon find your palette becoming more vibrant and personal!
Simple Brush Techniques

Mastering simple brush techniques is essential for creating beautiful watercolor paintings. By practicing these techniques, you'll gain confidence and develop your unique style. Here are four simple brush techniques to get you started with your watercolor ideas:
- Wet-on-Wet: Apply water to your paper before adding color for soft, blended effects.
- Dry Brush: Use a dry brush with minimal water for textured strokes and fine details.
- Glazing: Layer transparent washes to build depth and complexity in your colors.
- Lifting: Use a damp brush to lift paint off the paper, creating highlights or correcting mistakes.
Embrace these techniques as you explore your creativity, and remember, practice makes perfect! You're part of a vibrant community of artists.
Creating Washes for Backgrounds
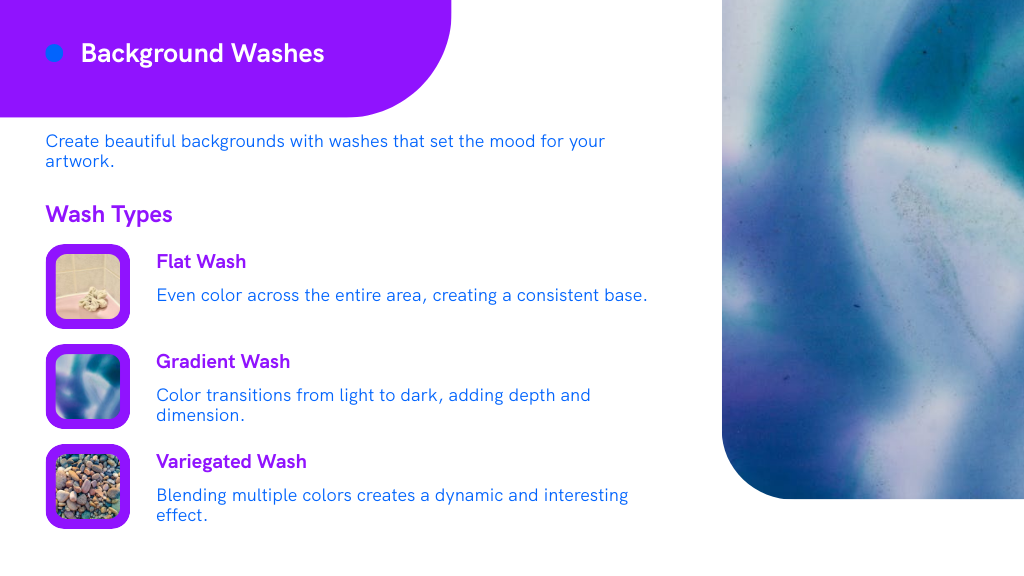
Creating beautiful washes for backgrounds can transform your watercolor paintings and set the mood for your artwork. Start with a wet-on-wet technique, laying down clean water before adding your paint. This method allows colors to blend softly, creating dreamy effects.
Here's a simple guide to different washes you can try:
| Wash Type | Description |
|---|---|
| Flat Wash | Even color across the entire area |
| Gradient Wash | Color changes from light to dark |
| Variegated Wash | Multiple colors blend together |
| Dry Brush Wash | Texture created by a dry brush |
Experimenting with these easy watercolor ideas will boost your confidence and help you find your unique style. Remember, every artist starts somewhere, so enjoy the process!
Painting Basic Shapes

Once you've got the hang of creating washes, it's time to explore painting basic shapes. This step is essential for building your confidence and skills in easy watercolor painting ideas. Start with simple forms and gradually add complexity.
Here are four basic shapes to practice:
- Circle: Perfect for fruits or flowers.
- Square: Great for buildings or boxes.
- Triangle: Use it for trees or mountains.
- Rectangle: Ideal for objects like books or windows.
Exploring Wet-on-Wet Technique
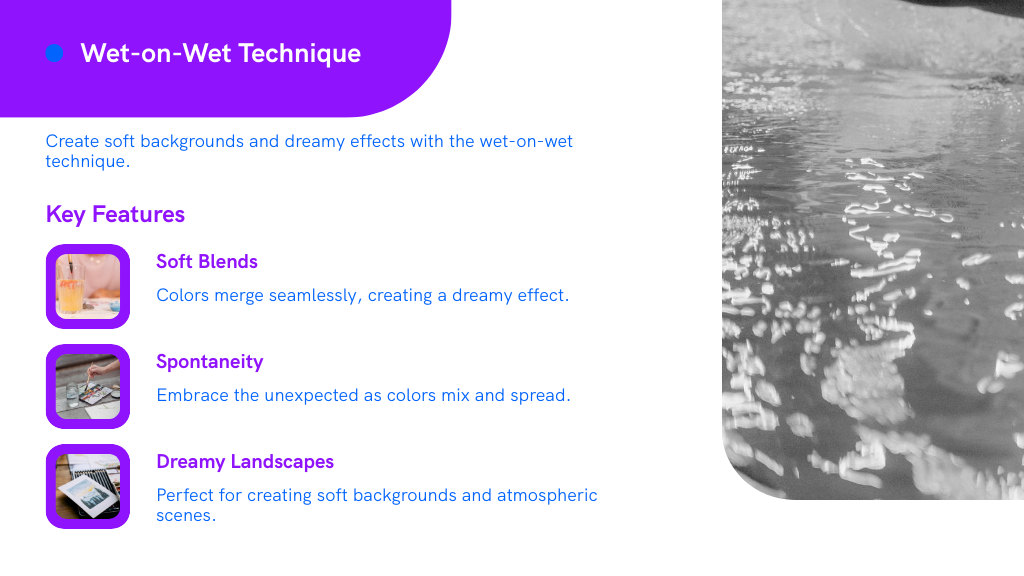
While you might feel comfortable with basic shapes, the wet-on-wet technique offers a whole new level of creativity in watercolor painting. This method involves applying wet paint to wet paper or previously painted wet areas, allowing colors to blend beautifully. It's perfect for creating soft backgrounds or dreamy landscapes in your easy watercolor paintings. To start, wet your paper with clean water using a brush. Then, drop in your chosen colors and watch them spread and mix.
Don't be afraid to experiment—this technique encourages spontaneity! Remember, there's no right or wrong here; just enjoy the process. Embrace the magic of wet-on-wet and see how it transforms your artwork, making it uniquely yours. You're part of a vibrant community of creators!
Practicing Dry Brush Techniques
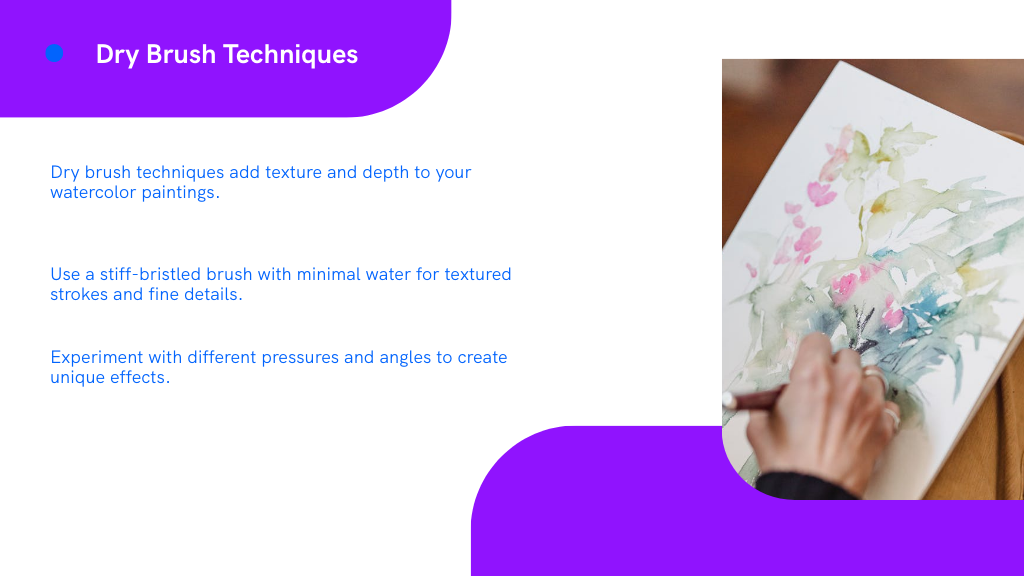
Ready to add some texture to your watercolor paintings? Practicing dry brush techniques can really enhance your work! This watercolor painting tutorial will guide you through the process. Here are some steps to get started:
- Choose the Right Brush: Use a stiff-bristled brush for best results.
- Select Your Paint: Opt for thicker paint or let your paint dry slightly.
- Control Your Water: Use minimal water to achieve that dry brush effect.
- Experiment on Paper: Practice on scrap paper to find your preferred pressure and angle.
Step-by-Step: Painting a Simple Landscape
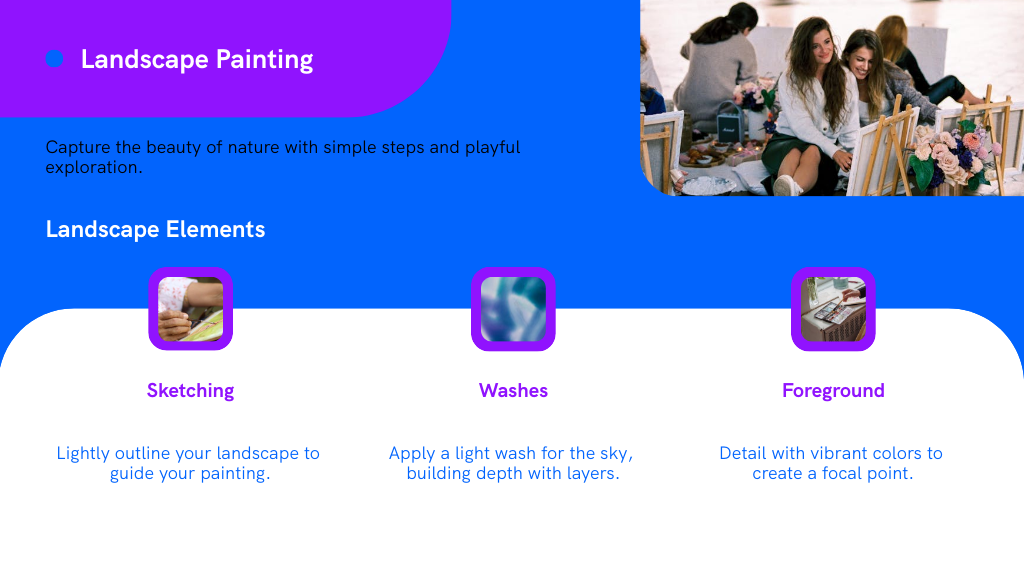
Creating a simple landscape in watercolor can be a rewarding experience, and it doesn't have to be complicated! Follow these steps to bring your vision to life.
| Step | Description |
|---|---|
| 1. Sketch | Lightly outline your landscape. |
| 2. Wash | Apply a light wash for the sky. |
| 3. Background | Add distant hills or trees. |
| 4. Mid-ground | Paint fields or water features. |
| 5. Foreground | Detail with vibrant colors. |
Don't hesitate to explore different watercolor painting ideas; landscapes can be as unique as you are! Remember, each stroke is a step toward your artistic journey, so embrace the process and have fun!
Step-by-Step: Creating a Floral Composition
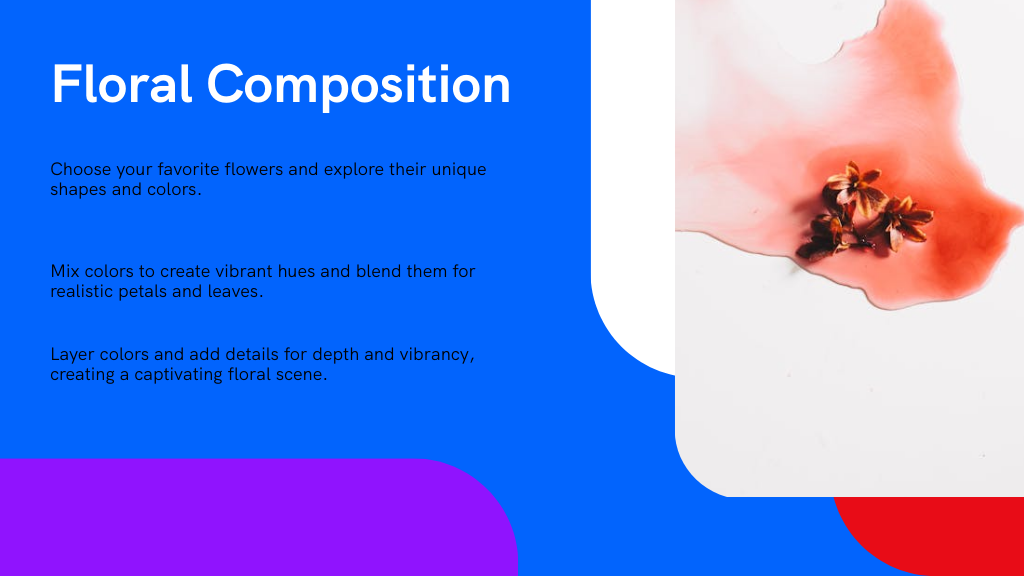
Now that you've explored landscapes, let's turn our attention to creating a stunning floral composition. You'll start by choosing your favorite flowers, then learn some color-mixing techniques to bring them to life on paper. Finally, we'll cover layering and detailing to add depth and vibrancy to your artwork.
Choosing Floral Subjects
Floral subjects can breathe life into your watercolor paintings, offering a vibrant palette and intricate details to explore. Choosing the right flowers can make your artwork stand out.
Here are some tips to help you select floral subjects that inspire you:
- Consider Seasonal Blooms: Choose flowers that are in season; they'll be easier to observe and paint.
- Focus on Shapes: Look for unique shapes and silhouettes that catch your eye.
- Explore Color Variations: Pick flowers with diverse colors to enhance your palette.
- Combine Different Flowers: Create interesting compositions by mixing various floral types for depth.
These watercolor ideas for beginners will help you feel more connected to your subject, making the painting process enjoyable and fulfilling.
Color Mixing Techniques
While you might feel overwhelmed by the idea of mixing colors for your watercolor floral composition, it's actually a simple and enjoyable process. Start by choosing your primary colors—red, blue, and yellow. Experiment by blending them on your palette; for instance, mix red and yellow to create vibrant oranges.
Remember, you can create endless shades for your flowers by adjusting the ratios. Don't hesitate to mix in a bit of white or black to lighten or darken your colors. These watercolor ideas for canvas can help you achieve depth and dimension in your composition. Trust your instincts and let your creativity flow; it's all about having fun and discovering your unique style along the way!
Layering and Detailing
After getting comfortable with color mixing, it's time to focus on layering and detailing your watercolor floral composition. This step is essential for creating depth and vibrancy in your artwork.
Here's how to make it easy:
- Start with the background: Use light washes to set the scene.
- Build-Up Layers: Gradually add darker colors to your flowers, letting each layer dry before adding the next.
- Add Details: Use a fine brush to create petals and leaves, focusing on highlights and shadows.
- Final touches: Enhance your composition with splatters or fine lines for texture.
Step-by-Step: Painting a Still Life
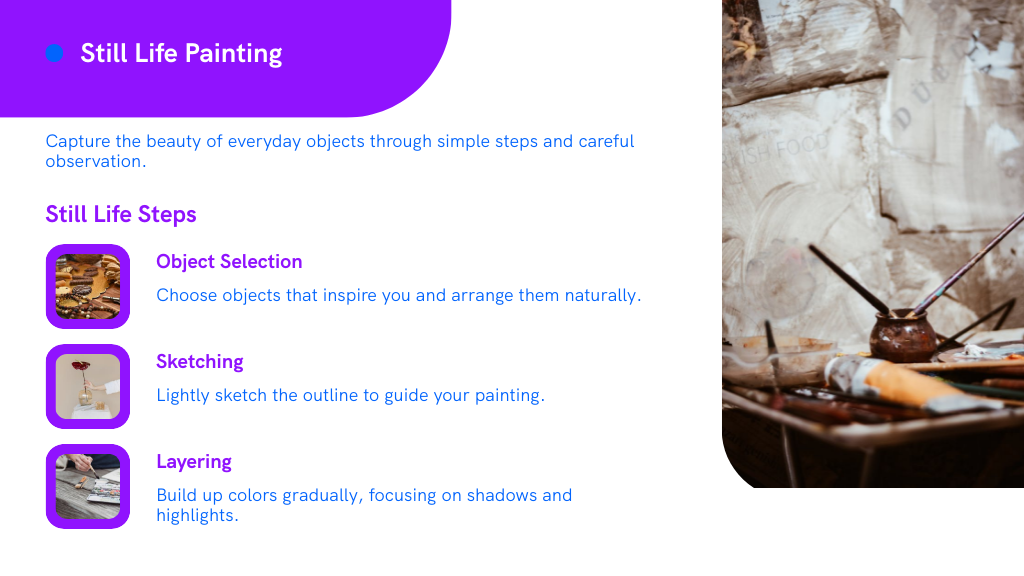
Creating a stunning still-life painting can be achieved in just five simple steps. First, gather your favorite objects—a fruit bowl or flowers work beautifully. Arrange them in a way that feels balanced and natural. Next, sketch the outline lightly with a pencil; this will guide your painting.
For watercolor art for beginners, start with a wash of light colors to establish your background. Layer your colors gradually, focusing on shadows and highlights to add depth. Finally, step back and assess your work; make any necessary adjustments.
Adding Texture With Salt and Other Materials

Adding texture to your watercolor paintings can really elevate your artwork, and using salt is a fantastic and easy technique to try. You can also explore alternative materials that create unique effects, so don't be afraid to experiment! Let's discover some fun ways to enhance your paintings with these simple methods.
Salt Techniques Overview
One of the most exciting ways to enhance your watercolor paintings is by incorporating salt techniques, which can add unique textures and enchanting effects. These methods aren't just fun but also make your watercolor easy and enjoyable. Here's a quick salt technique overview to get you started:
- Coarse Salt: Sprinkle it on wet paint to create starry patterns.
- Table Salt: Use it for finer textures; it dissolves more quickly.
- Colored Salt: Mix colored salt with water to create vibrant, textured washes.
- Rock Salt: This larger salt can create dramatic effects in your artwork.
Experiment with these techniques, and don't be afraid to release your creativity. You'll feel a sense of belonging in the watercolor community as you discover your unique style!
Alternative Texturing Materials
There are countless ways to bring texture to your watercolor paintings beyond just salt. You might try using materials like sponges, plastic wrap, or even crumpled tissue paper. Each of these can create unique effects that add depth to your artwork.
For an easy watercolor mural, consider sprinkling sugar on wet paint for a sparkling finish or using sand for a rough, earthy look. You can also experiment with natural materials, like leaves or feathers, to leave imprints on your paper.
Don't hesitate to explore different textures—it's all about having fun and letting your creativity shine. Remember, every artist has their own style, and these techniques can help you find yours while connecting with others who share your passion!
Experimenting With Effects
While experimenting with effects can seem intimidating, incorporating materials like salt into your watercolor paintings can lead to stunning results. These simple techniques can elevate your artwork and inspire you to explore new watercolor ideas. Here are some tips to get you started:
- Salt: Sprinkle salt on wet paint to create unique textures as it absorbs water.
- Plastic Wrap: Press plastic wrap onto wet paint, then remove it for interesting patterns.
- Sponges: Use a sponge to dab paint, giving a soft, textured look.
- Paper Towel: Blot wet areas with paper towels to lift paint and create highlights.
Don't be afraid to play around! Each experiment helps you find your unique style, and you'll feel more connected to your creative journey.
Experimenting With Color Gradients
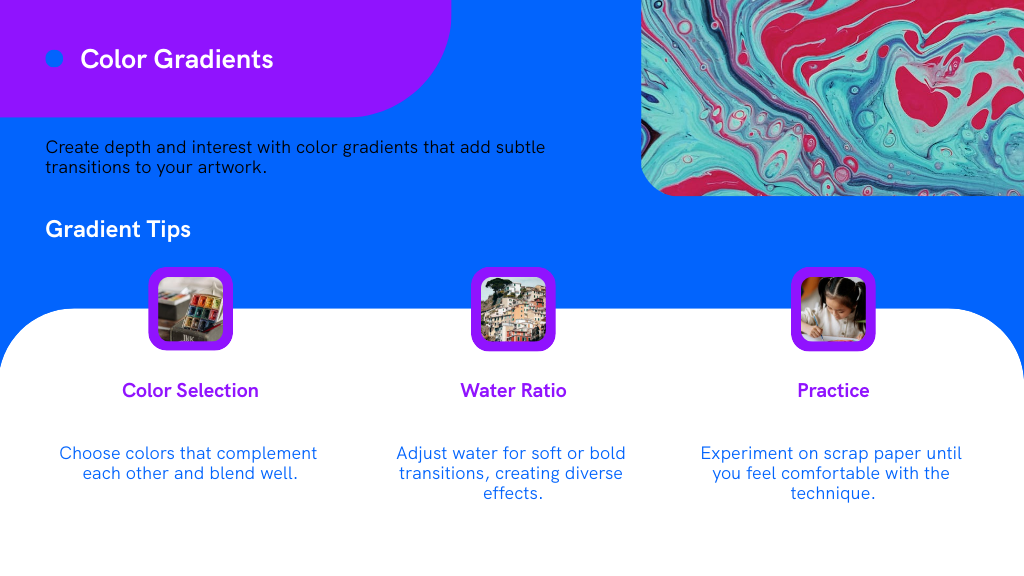
As you immerse yourself in the world of watercolor painting, experimenting with color gradients can truly elevate your artwork. Start by choosing two or more colors that inspire you. Wet your brush and the paper, then apply your first color. Gradually blend in the second, allowing them to merge seamlessly. You'll create beautiful changes that add depth and interest.
Don't be afraid to play with water amounts; more water results in softer gradients, while less creates bold changes. Practice on scrap paper until you feel comfortable.
Tips for Layering Watercolors
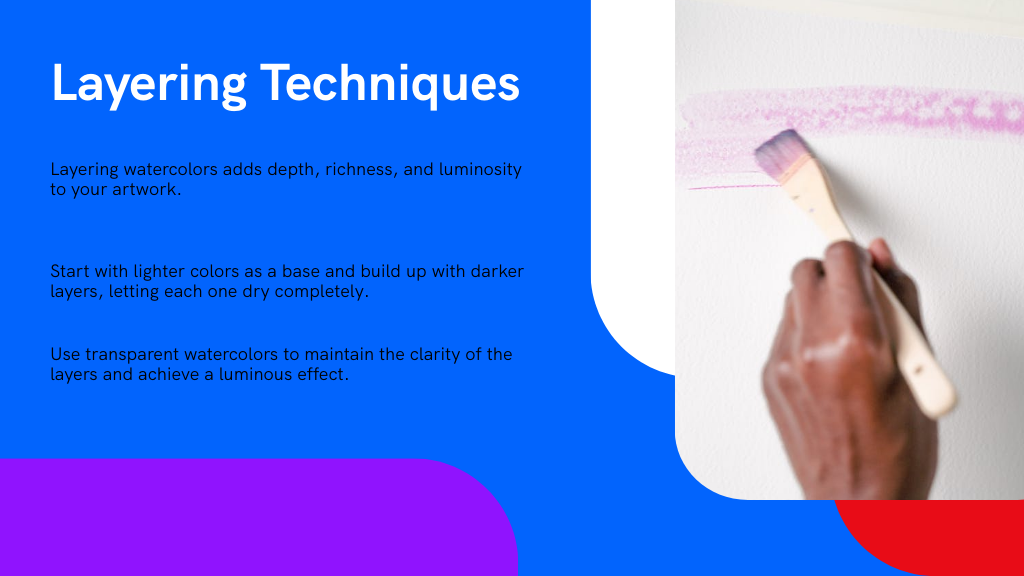
Layering watercolors can transform your artwork, creating depth and richness that captivates the eye. Here are some tips for layering watercolors to enhance your painting experience and inspire your watercolor art ideas:
- Start Light: Begin with lighter colors as your base, allowing for gradual buildup.
- Let it Dry: Always let each layer dry completely before adding the next to avoid muddy colors.
- Use Transparent Paints: Choose transparent watercolors to achieve luminosity and maintain the layers' clarity.
- Experiment with Techniques: Try wet-on-dry or wet-on-wet techniques to see how they interact.
Showcasing Your Artwork: Presentation Ideas

Now that you've created your beautiful watercolor paintings, it's time to think about how to show them off! Framing your artwork, displaying it on shelves, or even creating a gallery wall can really enhance its appeal. Let's explore some creative presentation ideas that will make your paintings shine!
Framing Your Paintings
While you may have poured your heart into creating a beautiful watercolor painting, how you frame it can elevate its impact and showcase your hard work. Framing your paintings not only protects them but also enhances their aesthetic appeal. Here are some tips to reflect upon:
- Choose the Right Frame: Select a frame that complements your painting's colors and style.
- Use Matting: Adding a mat can provide depth and make your artwork stand out.
- Consider Glass Options: UV-protective glass can preserve your watercolor painting ideas from fading.
- Think About Placement: Hang your framed piece in a well-lit area to showcase it beautifully.
With these framing tips, you'll create a stunning presentation that makes your artwork shine!
Displaying on Shelves
Displaying your watercolor paintings on shelves is a fantastic way to add a personal touch to your space. It invites warmth and creativity into your home. You can easily mix your easy water painting pieces with other decorative items to create an inviting display. Here are some ideas to inspire you:
| Shelf Level | Arrangement Ideas | Color Scheme |
|---|---|---|
| Top Shelf | Leaning against the wall | Neutral tones |
| Middle Shelf | Grouped by theme | Complementary colors |
| Bottom Shelf | Stacked with books | Monochromatic palette |
| Corner Shelf | Use a small easel | Pastel colors |
| Floating Shelf | Layered with plants | Bright and bold |
Let your creativity shine and make your space uniquely yours!
Creating Gallery Walls
Creating a gallery wall can transform any room into a vibrant showcase of your watercolor artwork. It's a fantastic way to display your creativity and make your space feel more inviting. Here are some simple watercolor ideas to get you started:
- Choose a theme: Focus on a color palette or a specific subject to create harmony.
- Mix Frames: Use a variety of frame styles and sizes for an eclectic look that feels personal.
- Arrange Before Hanging: Lay your pieces on the floor first to visualize the layout and make adjustments.
- Incorporate non-art elements: Add decor items like mirrors or plants for an extra touch of personality.
With these tips, you'll create a gallery wall that reflects your unique style and welcomes everyone into your creative world!
Conclusion
As you immerse yourself in the world of watercolor painting, remember that practice makes perfect. Did you know that studies show around 70% of beginners find joy in the process of creating art, even if they don't see immediate results? Embrace each stroke, experiment with techniques, and don't be afraid to make mistakes. Your unique style will emerge in time. So grab your brushes and let your creativity flow—you're on a wonderful journey of self-expression!